![]()
Minds On Microscopy: A Forensics Approach
Cynthia A. Surmacz
Information for Instructors
Introduction
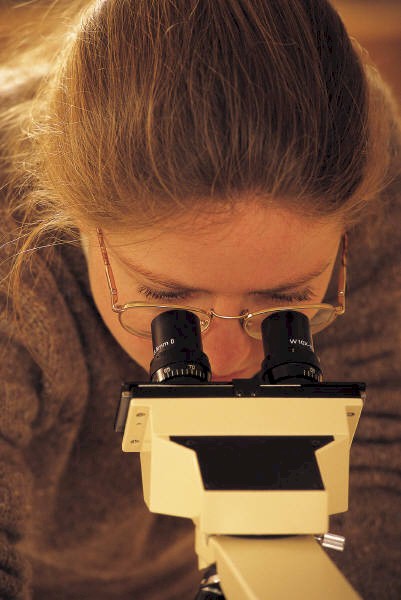
The theory and practice of microscopy is a common lab exercise in introductory biology labs for both majors and non-majors. Typically students are taught basic microscopy skills through a series of traditional activities like examining the letter e and viewing slides of crossed threads. Directions for these activities are usually presented in a set of cookbook-like instructions. The following lab activity demonstrates the use of a hypothetical crime "The Case of the Missing Candy" to teach students the basic skills of microscopy. Details for setting up a crime scene, preparing "student crime kits," conducting the lab, and evaluating student performance are presented. The activity is amenable to use in multi-section courses and can be easily adapted to meet an instructors particular objectives or curriculum. The basic microscopy skills students will develop in this activity include operation of both the compound and stereomicroscope, preparation of specimens for observation, and drawing specimens. The following concepts are introduced: magnification, resolution, field of view, image orientation, depth of field, and working distance. This investigative approach helps to develop students' ability to solve problems, to work cooperatively in groups, and to apply and synthesize data. It is consistent with science education reform efforts advocating investigative experiences that model how scientists actually learn about the natural world. We have found this forensics approach to be effective in teaching basic microscopy, developing students' analytical skills, and motivating them to explore the microscopic world.
Cindy Surmacz earned her doctorate in physiology from The Milton S. Hershey Medical Center, Penn State University. She is a professor in the Department of Biological and Allied Health Sciences at Bloomsburg University, Bloomsburg, PA teaching anatomy and physiology, cell biology, and introductory biology. This paper is based on a laboratory exercise that appears in The Joy of Lab: Anatomy and Physiology I (1999), Burgess, Inc. by Cynthia Surmacz, Margaret Till and Casey Shonis.
Procedures
Assemble student crime kits. Prepare one student crime kit for each group of four students. Kits may be assembled in an inexpensive plastic container with a lid. Each crime kit should contain the following: newsprint samples from a French magazine, classified ads, and a sports page; several small cardboard boxes; a serrated knife, scissors and single-edge razor blade; spools of cotton, rayon, and wool thread; a magnifying glass, and samples of sand, mulch, soil, rock salt, gravel, mud, pure hay, grass in small, individual re-sealable bags or containers.
Materials for the crime scene. Supplies needed: yellow police crime tape or yellow crepe paper; candy boxes cut open with a serrated knife (at least one per group); hay and sand; a small shovel and small containers (e.g., weighing boats) for students to scoop their sample, ransom notes made from letters from a French newspaper or magazine (one copy per group); spools of cotton thread (three different colors); articulated skeleton; tomato juice or other red liquid; prepared microscope slides of frog blood with label covered; small piece of something that resembles human skin. The following laminated signs are needed to label crime scene exhibits: Exhibit 1: candy boxes; Exhibit 2: debris; Exhibit 3: ransom note; Exhibit 4: fibers; Exhibit 5: blood; Exhibit 6: human skin.
 Sources
of crime scene materials. Microscope slides of normal and transformed
cultured cells can be prepared from Kit 1, Visualization of Normal and
Transformed Cells from CellServ
(www.cellservkits.com). The cells can be prepared ahead of time or
if you prefer, students can stain the cells themselves. Yellow tape saying
"caution" can be found in most large discount stores in the paint department.
French newspapers are available at newsstands in most metropolitan areas.
If this is not available another news source may readily be substituted.
They key is to find sources that have subtle differences in font style
and size.
Sources
of crime scene materials. Microscope slides of normal and transformed
cultured cells can be prepared from Kit 1, Visualization of Normal and
Transformed Cells from CellServ
(www.cellservkits.com). The cells can be prepared ahead of time or
if you prefer, students can stain the cells themselves. Yellow tape saying
"caution" can be found in most large discount stores in the paint department.
French newspapers are available at newsstands in most metropolitan areas.
If this is not available another news source may readily be substituted.
They key is to find sources that have subtle differences in font style
and size.
General lab supplies: Students will require compound light microscopes, stereomicroscopes, plain microscope slides, cover glasses, and dropper bottles of water.
Directions for setting up crime scene: The crime scene can be set up as follows in a convenient location in the laboratory.
- Use yellow police crime tape or yellow crepe paper to cordon off a section of the lab.
- Place several Exhibit 1 candy boxes in the area (at least one for each group)
- Place debris on the floor: a mixture of hay and sand (enough for each group to take a small sample.) Nearby place the sign: Exhibit 2: debris. Place small shovels and small containers like weighing boats for students to scoop up samples adjacent to the debris.
- Place copies of Exhibit 3 ransom notes made of cut out letters from a French newspaper. Each group should have their own copy.
- Position an articulated skeleton within the crime scene area. Place three colors of cotton thread in the ribs of the skeleton. There should be enough thread so that each group can have one of each color. Nearby place the sign: Exhibit 4: fibers.
- Sprinkle "Blood" drops on the floor. These can be made with any red liquid. Nearby, place the sign: Exhibit 5: blood. Outside the yellow taped crime area, place a box of prepared microscope slides of the frog blood with the labels covered.
- A piece of flesh from the butcher shop or grocery store can represent the human skin tissue. Nearby place the sign: Exhibit 6: human skin. Nearby place a box of prepared microscope slides showing normal cultured cells prepared from CellServ kit 1. (See note above for source.)
![]()
The actual material distributed to students appears on the next page. It includes the crime scenario, directions for handling and examining exhibits, crime lab reports, and list of suspects. The results of the six exhibits are as follows:
Exhibit 1: Candy box. Cuts were made with serrated knife.
Exhibit 2: Debris. The debris consisted of a mixture of sand and hay.
Exhibit 3: Ransom Note. The letters to compose the note were taken from a French newspaper.
Exhibit 4: Fibers: The fibers at the crime scene are cotton.
Exhibit 5: Blood. The blood cells are nucleated and therefore are from a non-mammalian source.
Exhibit 6. Tissue Sample. The cultured cells are normal (not cancerous.)
Student groups can identify the criminal on the basis of their microscopic studies. They can also use their results to justify their decision and to explain how they eliminated other suspects. The criminal is Barbara Styeshand. Ms Styeshand was born in France, a clue that she may use a French newspaper to prepare a ransom note. She lives on a farm and she recently returned from the shore. This provides clues for the debris. Her sunscreen confirms that she did not have skin cancer. Her Hawaiian shirt was cotton, consistent with the fibers found at the scene. She did carry a serrated knife to cut her French bread. Her pet is a bird and would have nucleated cells.
Go on to the next page for the student exercise
ã 2001 ABLE. All rights reserved.